What’s Covered?
- Registering new variables for existing WP Bakery elements
- Creating new controls and options in the editor dialog
- Overriding template parts for WP Bakery output
Welcome to our tutorials on WP Bakery’s page builder!
In this article, we’ll walk you through how we updated the controls and output of the WP Bakery “row” container so that we could add a special animation feature to our WordPress “Good Harvest” Theme.
WP Bakery has a good official knowledge base which we used to work much of this out, but given the time we spent going through it, we thought it might help to lay out the step-by-step version in case it helps you. The knowledge base can give you a few hints on how the plugin’s framework is set up, but in the end we had to fill in the gaps a little to get it to do the things we wanted for this particular project.
Editing the Page Builder Controls
To start, we wanted to build out a new feature to include in our theme. It was inspired by a client who wanted a particular animation effect for a new page layout. As always, we wanted to make sure updating or re-creating the effect on new pages was possible without having to ask us to code anything special for them. That meant building the new code to work with the rows’, columns’, and elements’ definitions and classes and apply responsive styling for it to work. See below how this worked out.
Note: if you’re viewing this on a tablet or phone, you may need to rotate your screen into a landscape view to see the effect. It is disabled here for smaller width screens.
First Section
There is some really entertaining information here to show off.
Second Section
This stuff is even cooler, but we can’t get too excited…
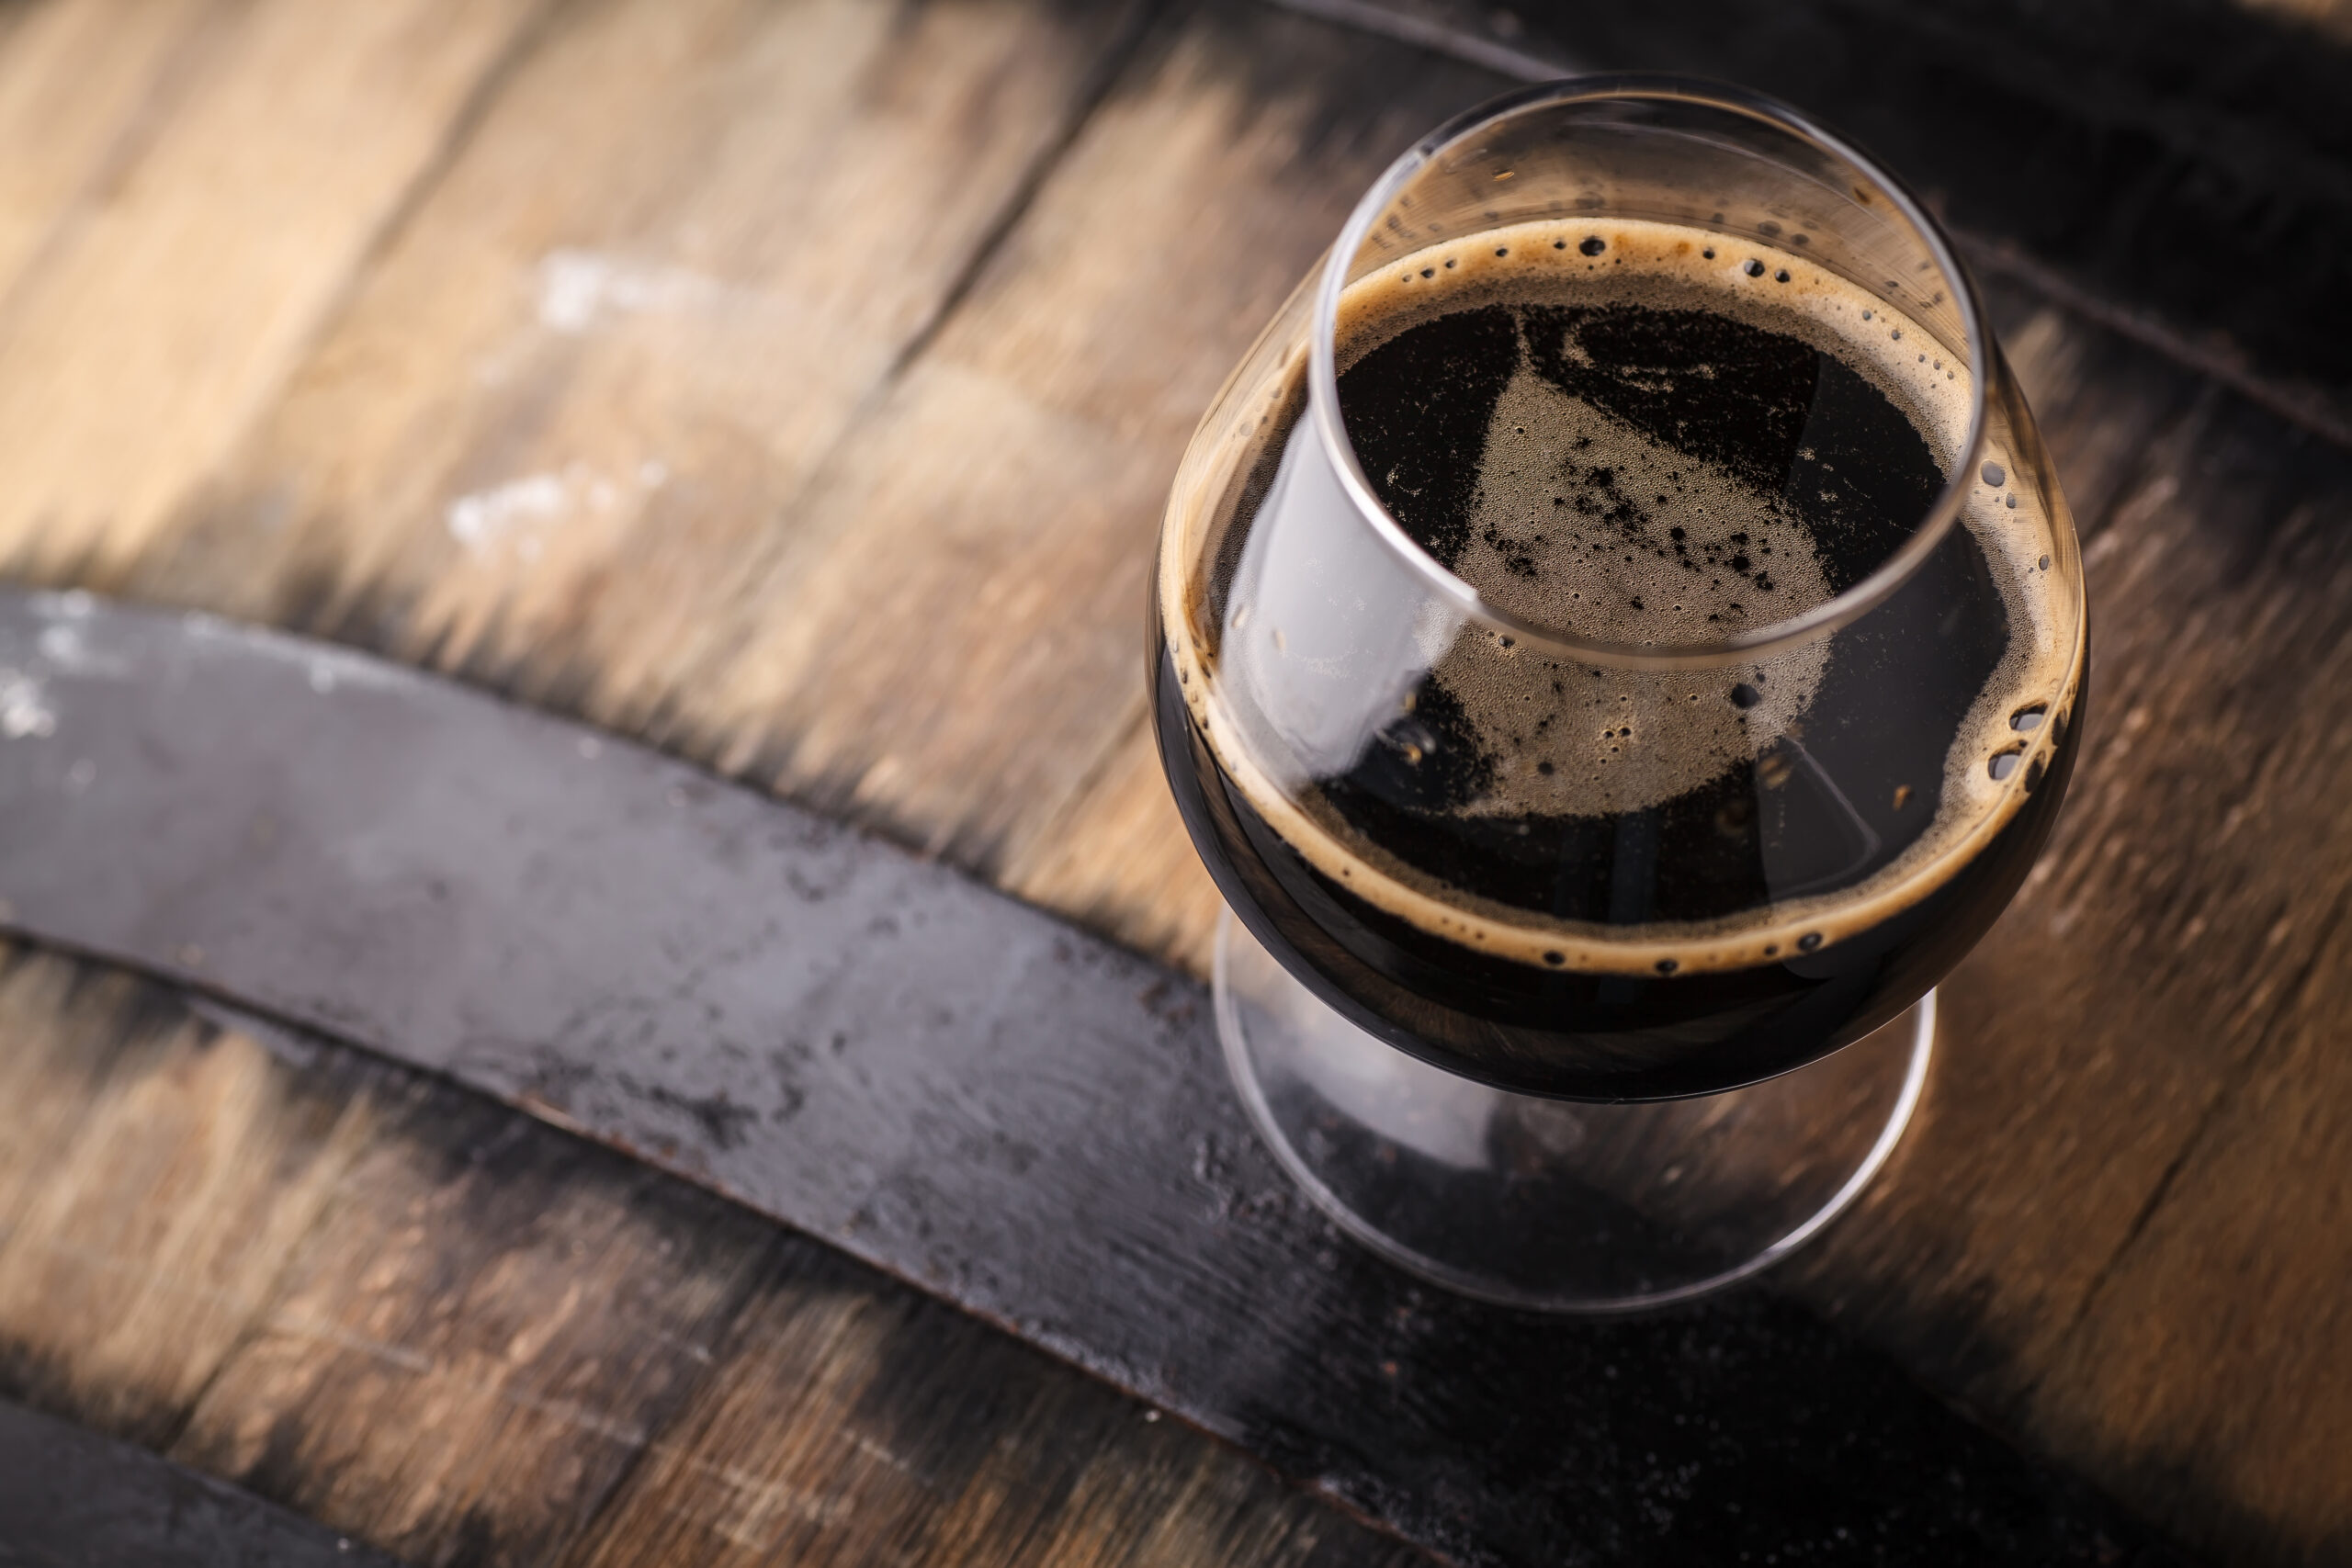
Third Section
…because this is the stuff that really rocks. Are you thirsty yet?
While we now had a row of content that could easily be saved as a template, we also noticed that there were some styling tweaks that we should make available to the client.
That’s where we decided to alter the controls on the “Row” dialog to give the client better control over some aspects of the presentation:
- How much padding should there be on either side of the images?
- At what point during the scroll the images began to transition?
- Should the images simply fade, or should they also shrink or grow during the transition?
To do this, we knew there was the ability to run some commands built into the WP Bakery framework to modify the way the Row controls were rendered. Basically, it meant we wanted not only a control to appear on the Row dialog, but also to then be able to use the values stored there to be used in the code.
Fortunately, there is a way to do this all at once. See the code here:
$params =  array(
 array(
 'type' => 'checkbox',
 'heading' => esc_html__( 'Use Image Swap on Scroll?', 'js_composer' ),
 'param_name' => 'img_swap',
 'description' => esc_html__( 'If checked, image swap effect will be used       for this row. Be sure to set the class of the column containing the         images that will fade into each other as "scroll_sticky" and the column     containing the content that will scroll next to it with the class           "scroll_scrolling".', 'js_composer' ),
 'value' => array(
esc_html__( 'Yes', 'js_composer' ) => 'yes' ),
),
array(
'type' => 'textfield',
'holder' => '',
'class' => '',
'heading' => __( 'Start Swap %' , 'good-harvest'),
'param_name' => 'swap_start',
'value' => 67,
'description' => __( 'Percentage of the image' , 'good-harvest'),
'group' => esc_html__( 'Effects Settings' ,'js-composer'),
'dependency' => array(
'element' => 'img_swap',
'not_empty' => true,
),
),
array(
'type' => 'textfield',
'holder' => '',
'class' => '',
'heading' => __( 'Image Scaling Percentage ' , 'good-harvest'),
'param_name' => 'swap_scale',
'value' => 100,
'description' => __( 'Scaling effect added to the image during the fade transition. A value less than 100 will cause the image to shrink as it fades and a value greater than 100 will cause it to grow. The default is no scaling at all.' , 'good-harvest'),
'group' => esc_html__( 'Effects Settings' ,'js-composer'),
'dependency' => array(
'element' => 'img_swap',
'not_empty' => true,
),
),
array(
'type' => 'textfield',
'holder' => '',
'class' => '',
'heading' => __( 'Horizontal Padding', 'good-harvest'),
'param_name' => 'horz_pad',
'value'=> '5vh',
'description' => __( 'Padding left and right of displayed image' , 'good- harvest'),
'group' => esc_html__( 'Effects Settings' ,'js-composer'),
'dependency' => array(
'element' => 'img_swap',
'not_empty' => true,
),
),
);
vc_add_params( 'vc_row', $params);
Let’s dig into that a little bit.
The last line of all that is the WP Bakery is the function we need to run to edit how the Row controls are displayed and how the data is structured in the shortcode. The structure is pretty well defined in the knowledge base under the vc_map() page. Of course, as with all functions, it will need to run at the right time so that the function is already defined, but before the dialogs and controls are all defined. That means you will want this function to run using the ‘vc_before_init’ action hook.
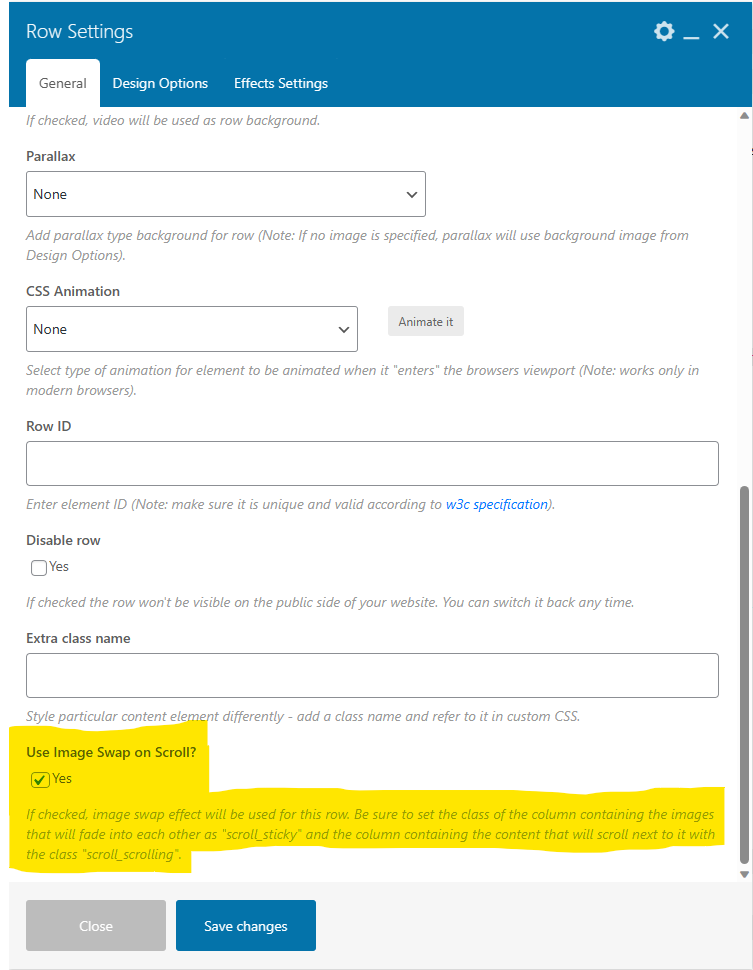
The next thing we wanted to do was create checkbox that would enable the “Image Swap” effect on the row. Here is the piece where we define that control:
array(
 'type' => 'checkbox',
 'heading' => esc_html__( 'Use Image Swap on Scroll?', 'js_composer' ),
 'param_name' => 'img_swap',
 'description' => esc_html__( 'If checked, image swap effect will be used       for this row. Be sure to set the class of the column containing the         images that will fade into each other as "scroll_sticky" and the column     containing the content that will scroll next to it with the class           "scroll_scrolling".', 'js_composer' ),
 'value' => array(
esc_html__( 'Yes', 'js_composer' ) => 'yes' ),
),
Within that, there are a few key attributes:
- type – This is the type of control we want in the form.
- heading – the label for the control.
- param_name – Important! This is how the data will be stored in the shortcode. It therefore becomes the variable name you will want to use in the output.
- description – This adds description and instruction to the control to help users understand what it is for and how it works. We want this to be escaped and translatable as shown.
- value – This is the value assigned to the checkbox when checked.
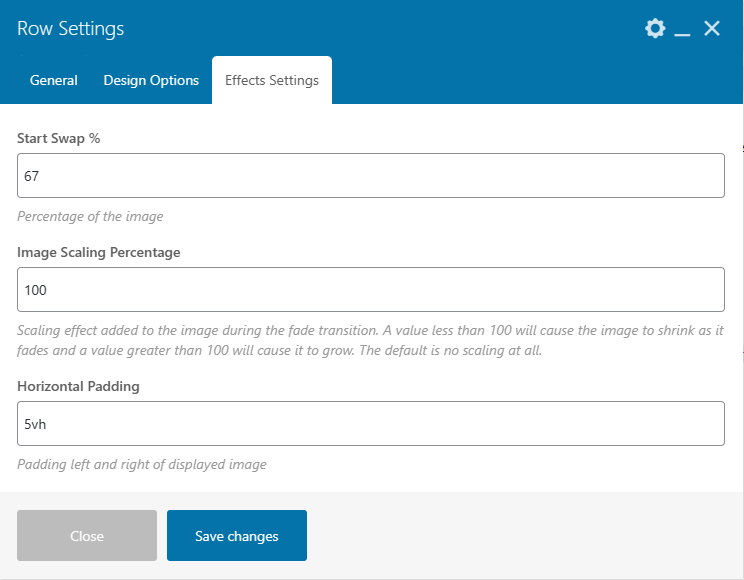
Just to make things look a little bit more organized, we also want our settings to shown whenever the checkbox is checked, but not display at all. For this, we chose to put all of our settings on a separate tab and make them all conditional with the dependency and group keys:
'group' => esc_html__( 'Effects Settings' ,'js-composer'),
 'dependency' => array(
 'element' => 'img_swap',
 'not_empty' => true,
 ),
Note: the ‘element’ key in the dependency array uses the ‘img_swp’ parameter by using its ‘param_name’ value.
Here’s how that all looks in the resulting dialog:
Using Our New Variables in the Output
For the final piece of the puzzle, we needed to make sure that when WP Bakery read its shortcodes to create the HTML output that we could use the new data to alter it appropriately. In our case, it was easiest to do everything we wanted to do by adding a class to the defaults that were already in place and then add data fields into the attributes of the vc_row div. That made it possible for our JavaScript to pull in the user’s settings and adjust the calculations for breakpoints and styling.
For this, we needed both create a new template for the vc_row shortcode and then point WP Bakery to the new location (since our templates were being generated by our theme’s companion plugin, not the theme itself).
Pointing WP Bakery to the template location was pretty simple. Once again, there is a ready-made function for us:
vc_set_shortcodes_templates_dir( HVST_ELEM_ROOT.'inc/wpbakery/vc_templates' );
Similar to the vc_add_params function, you will want this code to execute during the ‘vc_before_init’ action hook. the function only takes 1 argument: the full filepath to the templates folder. In the example above, we’ve previously set ‘HVST_ELEM_ROOT’ as a constant in the plugin to save us some typing whenever we needed to define a filepath.
Once you execute the redirect function, WP Bakery will first check that filepath for any templates related to the shortcode it’s generating (in this case ‘vc_row’). More specifically, it’s looking for a file that is [slug of the shortcode].php – vc_row.php. If it doesn’t find the template in that location, it falls back to the default templates defined in the plugin itself.
Next, we copied the existing template from the plugin and saved a copy in the location we just defined above. Once there, we made our edits to add our extra data fields to the row div:
extract( $atts );
 wp_enqueue_script( 'wpb_composer_front_js' );
 $el_class = $this->getExtraClass( $el_class ) . $this->getCSSAnimation( $css_animation );
 $css_classes = array(
 'vc_row',
 'wpb_row',
 // deprecated
 'vc_row-fluid',
 $el_class,
 vc_shortcode_custom_css_class( $css ),
 );
 if ( 'yes' === $disable_element ) {
 if ( vc_is_page_editable() ) {
 $css_classes[] = 'vc_hidden-lg vc_hidden-xs vc_hidden-sm vc_hidden-md';
 } else {
 return '';
 }
 }
 if ( vc_shortcode_custom_css_has_property( $css, array(
 'border',
 'background',
 ) ) || $video_bg || $parallax
 ) {
 $css_classes[] = 'vc_row-has-fill';
 }
 if ( ! empty( $atts['gap'] ) ) {
 $css_classes[] = 'vc_column-gap-' . $atts['gap'];
 }
 if ( ! empty( $atts['rtl_reverse'] ) ) {
 $css_classes[] = 'vc_rtl-columns-reverse';
 }
 $wrapper_attributes = array();
 // build attributes for wrapper
 if ( ! empty( $el_id ) ) {
 $wrapper_attributes[] = 'id="' . esc_attr( $el_id ) . '"';
 }
 if ( ! empty( $full_width ) ) {
 $wrapper_attributes[] = 'data-vc-full-width="true"';
 $wrapper_attributes[] = 'data-vc-full-width-init="false"';
 if ( 'stretch_row_content' === $full_width ) {
 $wrapper_attributes[] = 'data-vc-stretch-content="true"';
 } elseif ( 'stretch_row_content_no_spaces' === $full_width ) {
 $wrapper_attributes[] = 'data-vc-stretch-content="true"';
 $css_classes[] = 'vc_row-no-padding';
 }
 $after_output .= '
 <div class="vc_row-full-width vc_clearfix"></div>
 ';
 }
 if ( ! empty( $full_height ) ) {
 $css_classes[] = 'vc_row-o-full-height';
 if ( ! empty( $columns_placement ) ) {
 $flex_row = true;
 $css_classes[] = 'vc_row-o-columns-' . $columns_placement;
 if ( 'stretch' === $columns_placement ) {
 $css_classes[] = 'vc_row-o-equal-height';
 }
 }
 }
 if ( ! empty( $equal_height ) ) {
 $flex_row = true;
 $css_classes[] = 'vc_row-o-equal-height';
 }
 if ( ! empty( $content_placement ) ) {
 $flex_row = true;
 $css_classes[] = 'vc_row-o-content-' . $content_placement;
 }
 if ( ! empty( $flex_row ) ) {
 $css_classes[] = 'vc_row-flex';
 }
 $has_video_bg = ( ! empty( $video_bg ) && ! empty( $video_bg_url ) && vc_extract_youtube_id( $video_bg_url ) );
 $parallax_speed = $parallax_speed_bg;
 if ( $has_video_bg ) {
 $parallax = $video_bg_parallax;
 $parallax_speed = $parallax_speed_video;
 $parallax_image = $video_bg_url;
 $css_classes[] = 'vc_video-bg-container';
 wp_enqueue_script( 'vc_youtube_iframe_api_js' );
 }
 if ( ! empty( $parallax ) ) {
 wp_enqueue_script( 'vc_jquery_skrollr_js' );
 $wrapper_attributes[] = 'data-vc-parallax="' . esc_attr( $parallax_speed ) . '"'; // parallax speed
 $css_classes[] = 'vc_general vc_parallax vc_parallax-' . $parallax;
 if ( false !== strpos( $parallax, 'fade' ) ) {
 $css_classes[] = 'js-vc_parallax-o-fade';
 $wrapper_attributes[] = 'data-vc-parallax-o-fade="on"';
 } elseif ( false !== strpos( $parallax, 'fixed' ) ) {
 $css_classes[] = 'js-vc_parallax-o-fixed';
 }
 }
 if ( ! empty( $parallax_image ) ) {
 if ( $has_video_bg ) {
 $parallax_image_src = $parallax_image;
 } else {
 $parallax_image_id = preg_replace( '/[^\d]/', '', $parallax_image );
 $parallax_image_src = wp_get_attachment_image_src( $parallax_image_id, 'full' );
 if ( ! empty( $parallax_image_src[0] ) ) {
 $parallax_image_src = $parallax_image_src[0];
 }
 }
 $wrapper_attributes[] = 'data-vc-parallax-image="' . esc_attr( $parallax_image_src ) . '"';
 }
 if ( ! $parallax && $has_video_bg ) {
 $wrapper_attributes[] = 'data-vc-video-bg="' . esc_attr( $video_bg_url ) . '"';
 }
 if($img_swap) {
 $css_classes[] = 'scroll_swap_images';
 $wrapper_attributes[] = 'data-start_scroll="'.$swap_start.'"';
 $wrapper_attributes[] = 'data-swap_scale="'.$swap_scale.'"';
 $wrapper_attributes[] = 'data-horz_pad="'.$horz_pad.'"';
 }
 $css_class = preg_replace( '/\s+/', ' ', apply_filters( VC_SHORTCODE_CUSTOM_CSS_FILTER_TAG, implode( ' ', array_filter( array_unique( $css_classes ) ) ), $this->settings['base'], $atts ) );
 $wrapper_attributes[] = 'class="' . esc_attr( trim( $css_class ) ) . '"';
 $output .= '
 <div ' . implode( ' ', $wrapper_attributes ) . '>';
 $output .= wpb_js_remove_wpautop( $content );
 $output .= '
 ';
 $output .= $after_output;
 echo $output;
There are some things to note about how the template works. First, the code objectifies the shortcode attributes into the variable $atts and breaks them out into separate variables using the ‘param_name’:
$atts = vc_map_get_attributes( $this->getShortcode(), $atts );
 extract( $atts );
This means you can use the setting you gave to the ‘param_name’ key as a variable in your modified code.
The template also uses two main arrays in building the output:
$wrapper_attributes$css_class
The $wrapper_attributes is the master list of attributes that will be applied to the HTML tag. as such, the code eventually inserts the items in the $css_class into the $wrapper_attributes before rendering the final HTML.
As long as we put our edits before this happens, our adjustments are pretty easy:
if($img_swap) {
 $css_classes[] = 'scroll_swap_images';
 $wrapper_attributes[] = 'data-start_scroll="'.$swap_start.'"';
 $wrapper_attributes[] = 'data-swap_scale="'.$swap_scale.'"';
 $wrapper_attributes[] = 'data-horz_pad="'.$horz_pad.'"';
 }
Now we know that the HTML tag will include the class and the attributes we need for our JavaScript to work! Here is that tag in HTML from the example above in this post:
<div class="vc_row wpb_row vc_row-fluid scroll_swap_images" data-start_scroll="67" data-swap_scale="110" data-horz_pad="25px"></div>
Did you ever want to add extra controls and styling to your page builder? What kinds of changes would / did you make? Did this explanation help you do it? Let us know in the comments!
